
How do astronauts on the International space station get enough water to drink? The ISS filters and distils urine produced by astronauts into clean drinking water. Distillation without gravity poses unique challenges – learn about the ISS toilet!
Separation techniques are a joy to teach. Practicals provide an opportunity for students to apply their knowledge of matter to solve tangible chemical problems, from revealing the author of a ransom note to purifying a valuable compound.
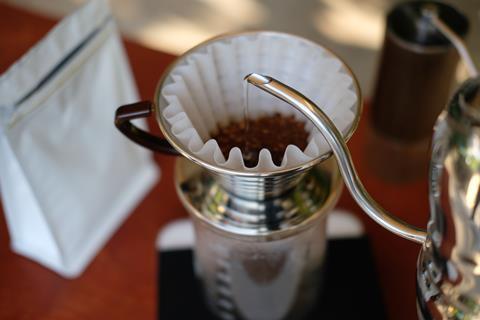
Source: Studio KIWI / Shutterstock
Putting separation techniques into context – there’d be no coffee without filtration
Mixtures are materials that contain two or more substances mixed together (see How to teach mixtures and solutions). We separate mixtures because they contain one or more useful substances or to identify what’s in the mixture.
Although the apparatus and purpose behind each separation technique look different, they all rely on a common principle: we can separate mixtures because they contain substances that have different physical properties.
To understand how separation techniques work, students need to understand some important concepts:
When first introduced according to the national curriculum in England
Physical separation technique
Separation is based on substances having different…
KS2
KS3
KS4
Suggested whole class practical (P) or demonstration (D). Ideas from Learn Chemistry
Sieving
Filtration
Evaporation
(Simple) distillation
Fractional distillation
Crystallisation
Solubilities in a solvent
Chromatography
Solubilities in a solvent
Make sure students are confident on the underlying principle behind the separation technique before introducing the apparatus/method. Distillation, for example, requires students to understand that different liquids have different boiling points. Demonstrate this by half-filling a 250 cm 3 beaker with hot water from a just-boiled kettle. Then place a boiling tube containing anti-bumping granules and 5 cm 3 of propanone into the beaker of hot water and watch it boil. Don’t use a Bunsen as propanone is highly flammable and ensure the laboratory is well ventilated. Ask students to explain what is happening – the presence of two colourless liquids, one bubbling and one not, will stimulate interesting discussions and possibly some cognitive dissonance. Now mix the water and propanone together and see if students can suggest how this mixture could be separated. Showing the relative boiling points of each substance on a number line can help students to conceptualise the problem.
Separation techniques provide an opportunity to develop students’ understanding of the particle model. Animations, such as those from PhET, show students what happens to the solute and solvent particles during evaporation. Demonstrate the separation technique at the same time as showing any animation – this allows you to highlight the analogous parts. Develop this further by asking students to draw particle pictures at different stages of the separation process. Find out more about this ‘zooming-in approach’ by visiting thescienceteacher.co.uk.

Download this lesson activity on drawing particle pictures to represent what happens during distillation [MS PowerPoint or pdf].
Good practical science by Sir John Holman lists five purposes of practical work that you can use to focus outcomes. Focus on developing one or two aspects in the lesson but no more. Don’t be afraid of isolating individual practical skills from a full-length practical. Spending ten minutes (or longer!) folding filter paper is time well spent; making this a timed competition can be fun and memorable. Then, when the class have sufficient prior knowledge, it’s time to bring skills and understanding together to challenge students to separate salt from sand or plan for desert survival.
Separation techniques provide a platform to remedy common misconceptions. Some students think that substances disappear when they dissolve – evaporation shows this is not true. Some believe that air is empty space – distillation proves otherwise. Other erroneous ideas include:
Source: golfitti / shutterstock.com
An effective way to find out if your students know the names and uses of apparatus is to play Pick It! Place various pieces of apparatus and reagents on the front desk, including some distractors eg test tubes and boiling tubes. Divide the class in half and ask one student to come to the front and pick a specific item of apparatus. If they get it right, the team gets a point. If they get it wrong, provide feedback and they try again. Now ask the other half of the class to pick a different item. You can raise the challenge by asking students to pick a piece of apparatus or reagent for a specific task and justify their reasoning.
With any practical method it can be useful to pose the question ‘what if?’ to explore students’ understanding of steps in a procedure. What if:
Students’ ideas about separation are developed through an increased understanding of bonding and intermolecular forces. Fractional distillation is introduced, requiring students to understand the relationship between molecular size and boiling point, and crystallisation is linked to the formation of solid salts and lattice structures.
Many thanks to Claire Couves and Isabel Instone who first helped me to appreciate the importance of ‘zooming in and out in science’. Thanks also to David Paterson for helpful guidance with this article and to Vanda Takacs for refining the boiling propanone demonstration.
Jasper Green is founder of thescienceteacher.co.uk, a website providing teachers with ideas and resources to help teach key concepts in biology, chemistry and physics.